ShapeMaster User Guide
 |
When ShapeMaster is initially opened, List View is the default. For a detailed discussion, see topic on List View.
To locate information about any commands or tabs,  click on the area of interest on ribbon image above.
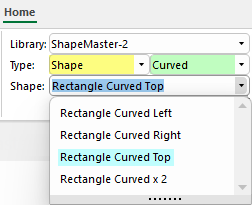
This group of drop down lists allows you to locate and select a shape/item to add to your current job/drawing...
Normally selected when starting the program application.
Extra Note : Filters by SubType = Curved - click to view
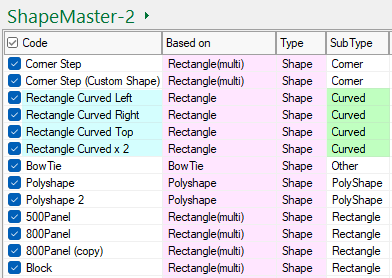
This is a snapshot of the Library Catalog Manager for the DoorMaster library. It has been sorted so that you can compare the Doors available with the SubType filter used in the image on the right.
The SubType can be customised/renamed as per your requirements to make this more relevant to your business. See topic on how to create a Custom Range in the LCM.
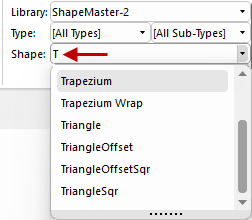
As discussed next, you can type in the first letter of required shape, useful with a long list.
To add your selection to the List, click on the Add from Library button or use the Keyboard Shortcut [F12]
ShapeMaster offers a large selection of shapes which can be filtered in a number of ways using the ...
See discussion above on Shape Selection, to understand how this works.

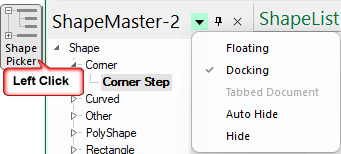
The Shape Picker button is used to turn visibility of this on or off.
The picker window is by default docked to the left but this can be changed. If you want to make the most of the available screen use the Auto Hide feature. See the topic on Docking or Floating for a full discussion.
Tools such as the Shape Tool and Drawing Tools are just like a staging area where items are prepared for addition to a drawing. The background colour is blue, providing a visual confirmation that you are about to use the properties of the selected tool.
When you select a shape from a library, all the data for that shape is placed into the Shape Tool. Then, the shape described by the current Shape Tool data, is added to the list provided the Shape Tool is active when you click on 'Add from Library', or use the [F12] keyboard shortcut.
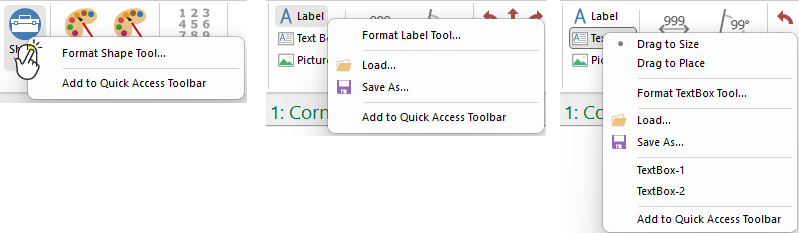
Right clicking on a tool will present a menu allowing you to 'Format..' a shape before placement.
The Shape Tool is used to to customise a cabinet BEFORE placement and provides a quick method for inserting a shape from the library. When you select a cabinet from a library, all the data for that cabinet is placed into the Shape Tool. To confirm that you are updating the tool, the background colour of the property sheet will be blue.
Then, provided the Shape Tool is active when you click on 'Add from Library', the shape described by the current Shape Tool data is added to the List.
The distribution base library (.qil) provides all users with a preload of some useful palettes, which are shown as images in Current Palette.
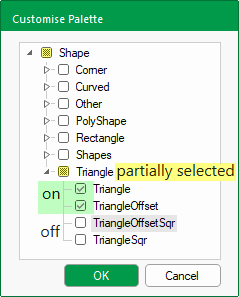
The Change Palette tool allows you to Add your favourite palettes for quick use and customise using a tree. The checkboxes in the tree are three-state i.e. on, off or partially selected, as shown right. This lets you select and deselect subtrees of shapes for your palette.
When you save a custom palette which saves in the catalog (.qim).
If you make additions/changes to the gallery then you will need to Regenerate Images.
 Watch the Video on how to customise the Palette and see the topic on Palette and Gallery Images.
Renumber all items into sequence.
To illustrate, six shapes were placed in the list and then the first 3 were deleted. As shown, the List View shows ID 004 to 006.
When the Renumber All Items button is clicked, the shapes have been assigned ID's 001 to 003.
This feature is currently not available and is therefore turned off on the File > Advanced page.
The Drawing Properties, or defaults, can be customised for each job and overrides the Catalog/Library Properties. However, you can override the Drawing Properties [F4] by customising the Shape Properties.
The view command buttons change the view from List View to Machining View (and visa versa) or allows you to open the Library Catalog Manager.