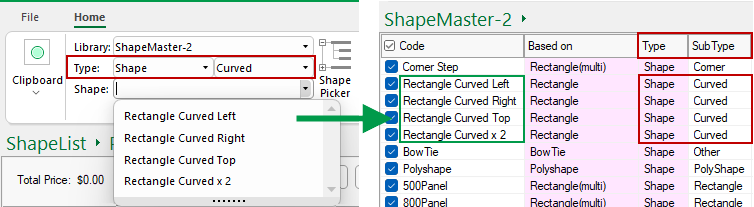
 click on the area of interest.
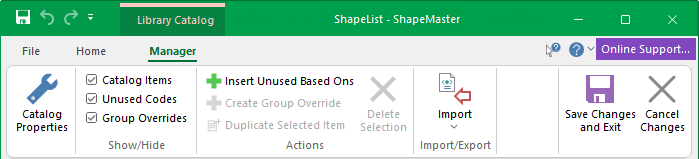
Show/Hide Filters
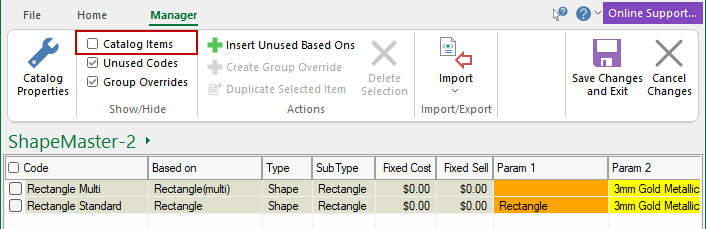
Catalog Items
If you untick this box, all shapes that are a part of the catalog will be removed from the display.
All ticked shapes are removed from display (not deleted). Unticked shapes, as shown, are not available in Shape Selection on the Home tab.
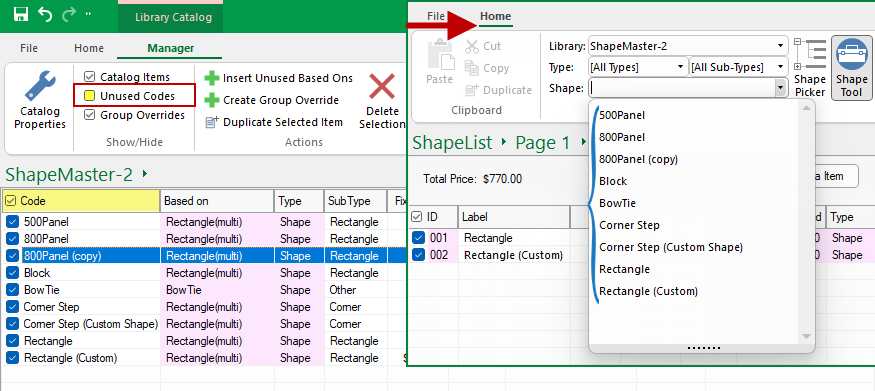
Unused Codes
If you untick this option it will display only those shapes that are checked i.e. the shapes shown above will not appear in the list.
This means you will only view those shapes that you are working with. It does not delete the shape.
Group Overrides
When using the Library Catalog Manager you create catalog items based on the underlying library.
If you create more than one catalog item using the same Based On shape, this is called a group.
Actions
Insert Unused Based Ons
Library updates are regularly made available to customers with a valid Customer Care Agreement. Sometimes a new Based on shape is added by the library developer which you will want to add to your own customised library (.qim).
Another way to Insert Unused Based Ons is by using the right click menu.
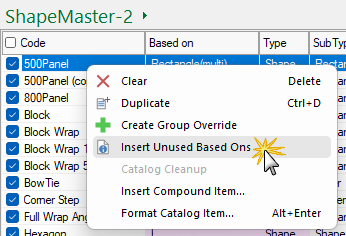
See Video [0:45 mins]
Create Group Override
When using the Library Catalog Manager you create catalog items (.qim) based on the underlying library (.qil). If you create more than one catalog item using the same Based on shape, this is called a group.
Sometimes, every single catalog item in the group needs to be changed in the same way. For example, the Based on library shape may have a depth of 313mm but in your business, every shape of this kind actually is made with depth 363mm. In this case, instead of overriding the depths in each catalog item one at a time, we can do it once, using a ‘Group Override’.
Group overrides are applied before any individual overrides, so when you create a new catalog item based on the same shape, the group override values are applied and then any individual customisation's are applied after that.
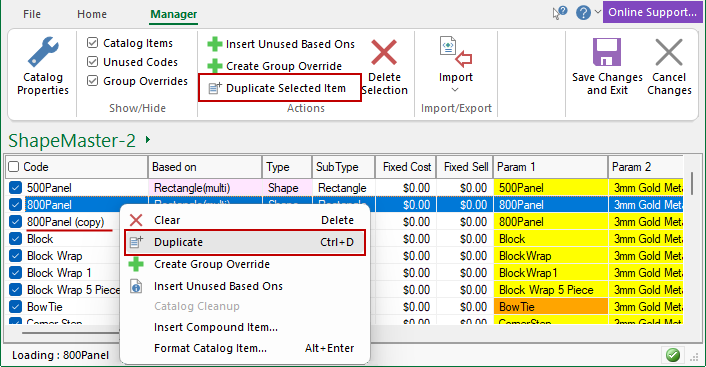
Duplicate Selected Item
You can create a copy of an item by selecting an existing Shape/Item' and 'Duplicate Selected Item' (option also available from the right click menu as per example).
This can then be customised as required by either double clicking on applicable item or selecting Format Catalog Item from the right click menu.
Example: Duplicate Selected Item
The Back part has been duplicated. The item created, i.e. Back (copy), can be renamed and customised (or formatted).
Follow link for a full discussion of duplicating/customising shapes in separate topic.
Custom Selection on Home tab
You can limit the Shape selection on the Home tab by enabling only the Codes required by your company, as shown. Do this by simply...
- disabling all by unticking the 'Use Code' checkbox;
- ticking only required individual codes;
- finally untick the 'Unused Codes' which allows you to check your selection in the Library Catalog Manager.
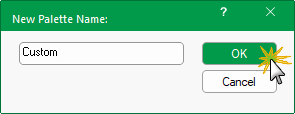
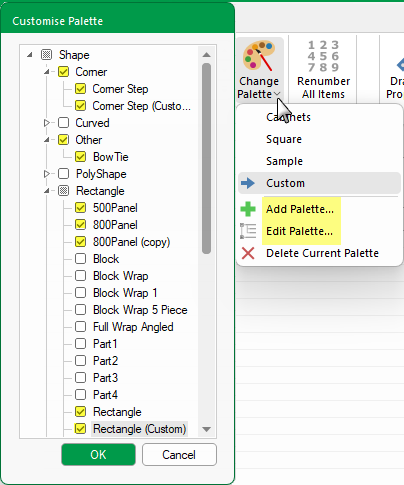
Another way is to create a custom Palette for quick and easy selection
To create a custom Palette, click on the 'Add Palette...' option from the right click menu, as shown.
You will be asked to provide a unique name - see full discussion on Palette and Gallery Images (which includes a video tutorial).
Then tick the shapes that you want to use in your custom palette for quick selection. Click OK when shape selection completed.
You can use the 'Edit Palette...' at anytime to add/delete shapes from any of the palettes listed.
Delete Selection
Deletes the selected 'Catalog Item' from the list. A message will be presented for the action to be confirmed.
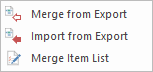
Import / Export
Import
Merge from a tab-delimited ASCII (text) or XML file into the current drawing.
The importing options are also available from the File menu.
The Import from ASCII and Merge from ASCII options are very similar: both load values from a text file and add them to the current drawing. If a property already exists, it is overwritten with the new value.
The main difference is that Import clears the current properties first, so is effectively the same as starting a new drawing (or library) and then using Merge.
Merge is the most common option, as it allows you to add a handful of property values to an existing drawing.
OLE objects cannot be imported into a drawing or library. You will receive a warning when you try to export an OLE object, and you should delete the object then retry the export.XML or ASCII
ASCII File format
The term "ASCII file" refers to a "text" file that is readable by the naked eye (it only contains the letters a-z, numbers, carriage returns, and punctuation marks). Therefore, any file that one can read with a common editor, like simple Windows Notepad program, is considered an ASCII file.
XML File format
Some benefits of using XML format files are that they :-
- are self-describing, making them easy to read, create, and extend. They are human readable, making it easy to understand how data is interpreted during bulk operations.
- contain the data types of target columns. The XML encoding clearly describes the data types and data elements of the data file and also the mapping between data elements and table columns.
- allow for loading of a field that contains a single large object (LOB) data type from a data file.
- can be enhanced yet remain compatible with its earlier versions. Furthermore, the clarity of XML encoding facilitates the creation of multiple format files for a given data file. This is useful if you have to map all or some of the data fields to columns in different tables or views.
- can be used to bulk import data into tables or non-partitioned views and to bulk export data.
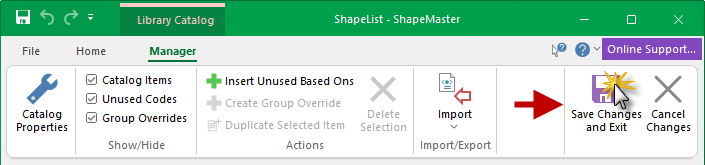
Save and Exit
When all changes have been completed, you need to save the Catalog.
- in the LCM ensure that you click the Save Changes and Exit button.
- To close without making/saving changes, click on the Cancel Changes button.
It is possible to click on other menu tabs but this does not close the LCM. You must use either the Save or the Cancel command to properly exit.
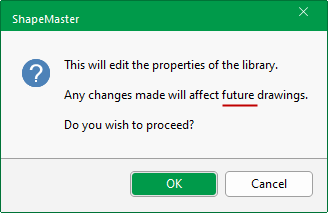
- click OK to the message.
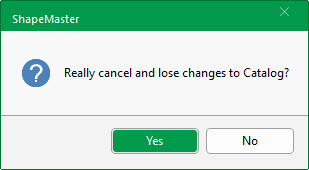
Cancel Changes
Cancel changes if you decide not to save any of the changes made. A message will be presented to ensure that you really want to lose all changes to the Catalog.


 can be used to uncheck the current list, if already checked.