ShapeMaster User Guide
In section we will discuss how to price a drawing/job, using the setup details outlined below, and the associated reports.
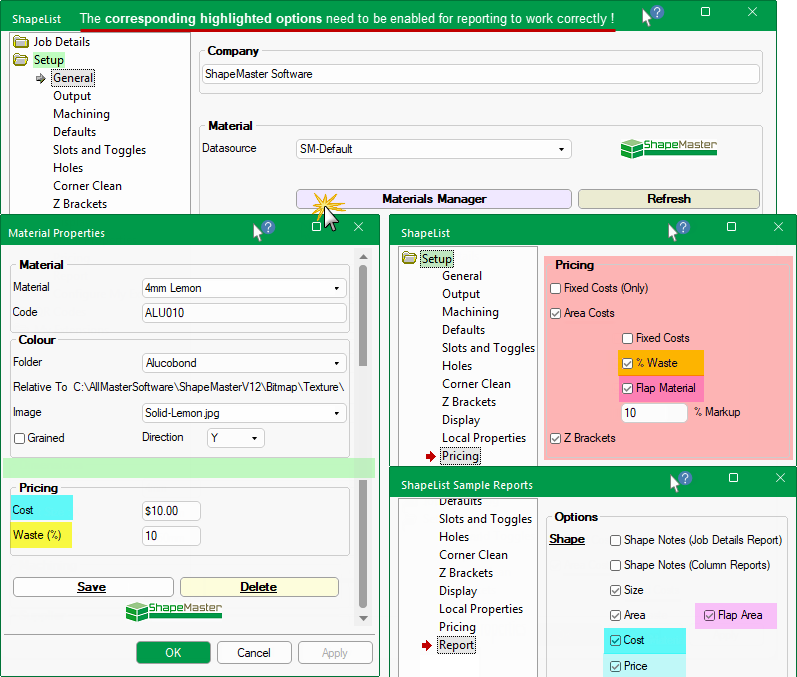
For pricing to work and be reported on correctly, the costs of materials and brackets etc must be set correctly. Corresponding options on the Setup > Report page also need to be enabled for these calculations to be included in reports.
It is recommended to set up Pricing defaults in the Catalog when you decide how the majority of your jobs are to be priced. The reports can then be easily customised for each job if required.
Pictorial Summary of options required to be enabled for reporting of price
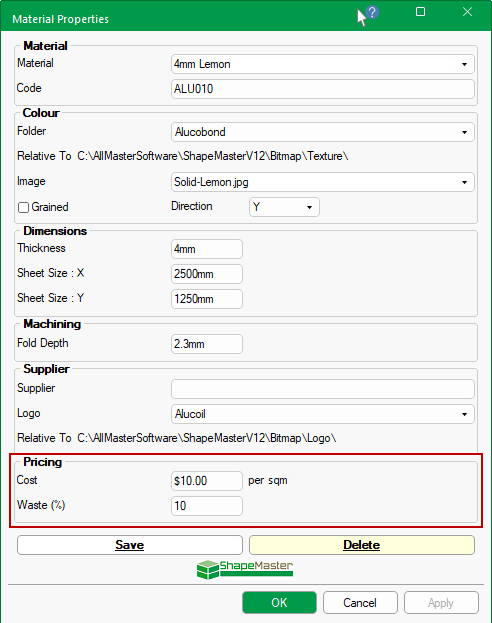
Cost : Set required materials in the Materials Manager [SM-Default only] and enabled on the Setup > Report page.
Waste % : This will be added to the Cost. Set % in Materials Manager and enabled on the Setup > Pricing page.
Flap Material : Enable on Setup > Pricing and so that it will add to the Area (per sqm), enable the Flap Area on the Setup > Report page.
Sell Price : Calculated using the % Markup on the Setup > Pricing page and the Setup > Report page needs the Price to be enabled.
Basic requirement for the all the tutorials prepared in this section are summarised here.

Click to view Shape in Current Editor mode with dimensions
For these tutorials we have kept the shapes as simple as possible i.e.
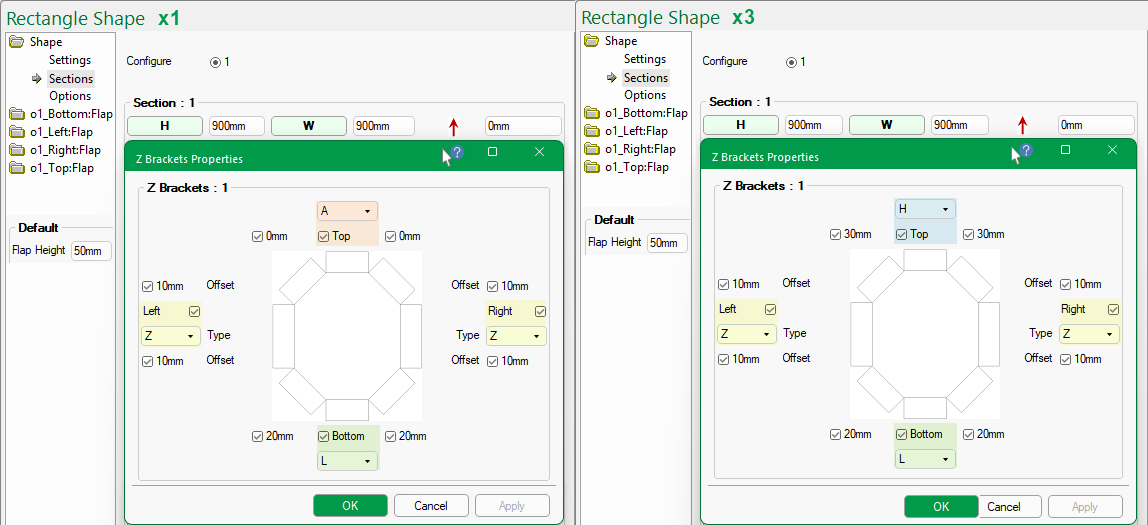
Shape 1 : Rectangle with a quantity of 1
 button and select brackets as shown below left.
The Offsets are not important for these tutorials but the defaults are set on the Setup > Z Brackets page of the Catalog/Drawing Properties.
Shape 2 : Rectangle with a quantity of 3
button and select brackets as shown below right.
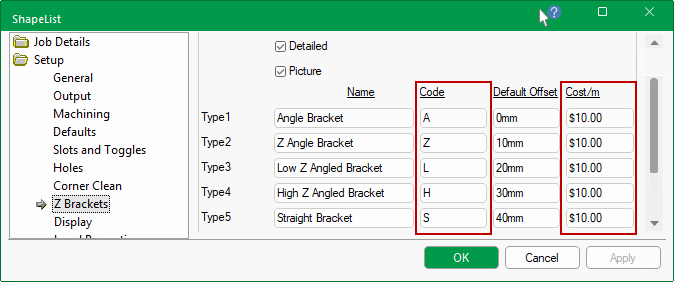
The material used in these tutorials is '4mm Lemon' and has been set with a Cost price of $10 per sqm in the Materials Manager.
The Materials Manager is accessed from the Setup > General page of the Drawing Properties - See Setup Materials using Materials Manager.
Waste is a percentage of waste per sqm which is reflected in the resulting price e.g. if a shape requires 1 sqm of material and the waste is 5% then the price is the cost for 1 sqm plus 5%.
The Sell price % Markup can be set on the Setup > Pricing page - for these tutorials set this to 10% .
Setup > General page : Materials Manager - Click to view
For simplicity we will Cost all brackets used in this tutorial at $10 per meter.
It is recommended to set up Pricing defaults in the Catalog when you decide how the majority of your jobs are to be priced. The reports can then be easily customised for each job if required.
Z Bracket Default Offset settings are not important for these tutorials.
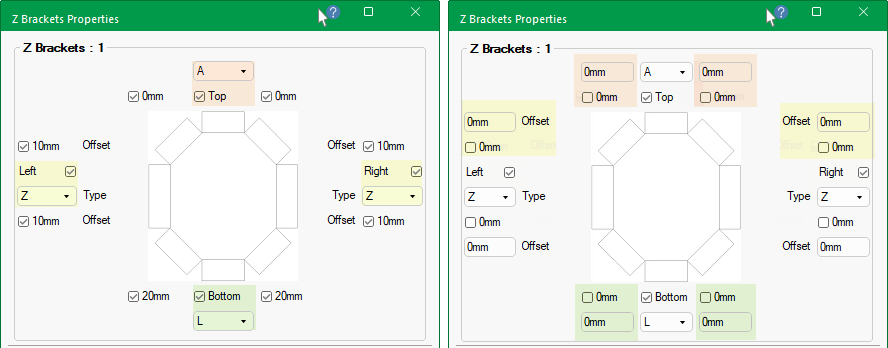
Example of how the Default Offset can be used
The 1st image (left) shows that the default offsets are used by ticking the applicable checkboxes.
The 2nd image (right) shows the 'Offset' checkboxes are unticked and an overriding offset can be manually entered in the provided edit boxes.