ShapeMaster User Guide
Each Shape has Flaps Properties that can be accessed either from the...
Click to Expand
or
Click to Expand
Accessing the Flaps properties are dependent on the whether the shape is Standard or Multi. However, the options are the same.
See the topic on Dimensions of Overall Section for more examples.
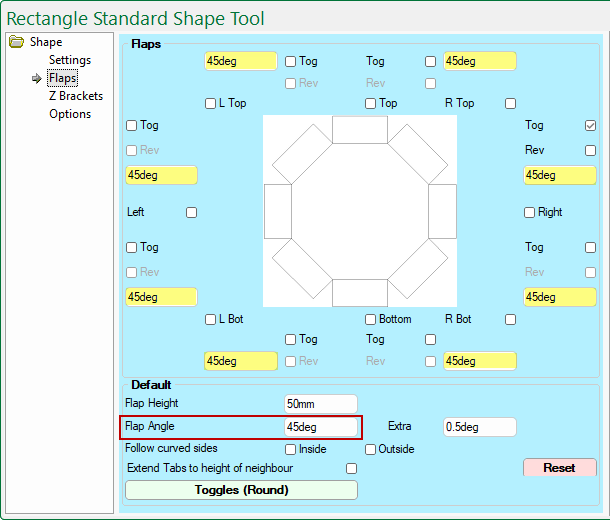
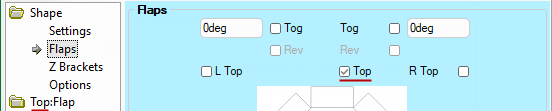
For a standard shape, options to add and control flaps are available on the Shape > Flaps page (see images above).
As flaps are added, related categories are added in the Category Tree. This allows each added flap to be individually customised including the addition of Secondary Flaps.
Flap defaults are set on the Setup > Defaults page of the Drawing Properties. These can be overridden at Shape level.
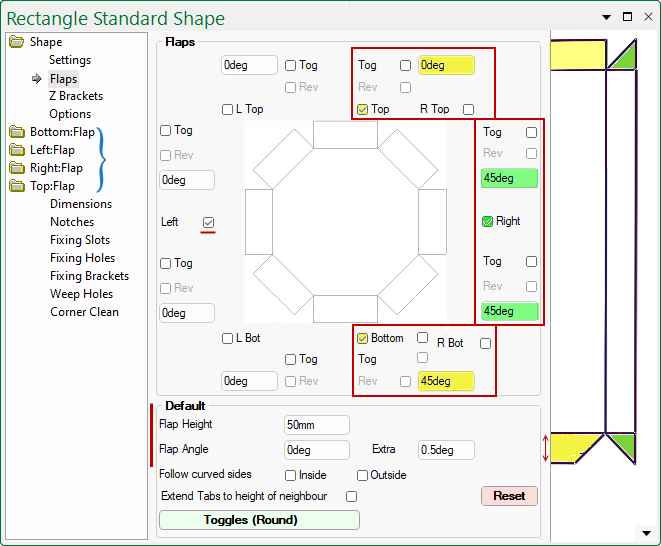
- The Default Flap Height stated on the Flaps page is 50mm (see image below for example).
- To override the height of all flaps on the current shape, simply enter a new height here.
- To override the height of individual flaps, select the related category > page e.g. Top:Flap > Dimensions page (follow link for full discussion).
- The Default Flap Angle stated on the Flaps page is 0 degrees.
- To override the angle of all flaps on the current shape, simply enter a new value here - see example.
Example
In this example, the Default Flap Angle has been changed from 0deg to 45deg.
As shown, the angle edit box for all flaps (highlighted) have been updated to be 45deg.
- To override the angle of individual flaps, simply enable applicable checkboxes and angle edit boxes, as per the following two examples.
- The Reset button will reset the values in the Default group to the Setup > Defaults page of the Drawing Properties.
- Secondary Flaps can be added to individual flaps and customised using the related Dimensions page e.g. Top:Flap > Dimensions (click on image to view).
Click to view Dimensions page and an example of Secondary Flaps
- In this example, we have turned off the Right flap (which removes the Right:Flap category shown above) and...
- enabled the Right Bottom flap and set to an angle of 50 degrees;
- this creates Bottom_Right:Flap category which again allows further customisation.
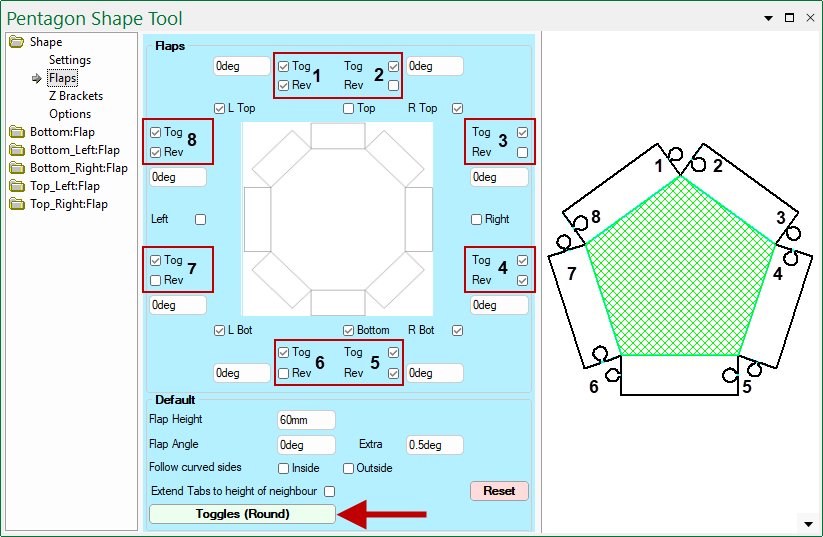
When Toggles are added, the related Rev checkbox is made available.
The following example illustrates how these checkboxes work - see numbered checkboxes relating to preview pane image.
- Tog - turns On/Off the applicable Toggle.
- Rev - used to reverse this toggle/toggle hole on the selected tab.
Toggles can be either Round or Extended. The Toggles button opens a property dialog (click on image) which allows you to override the dimensions set on the Setup > Slots and Toggles page of the Drawing Properties.
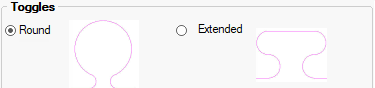
Click to view Toggle configuration options
The style, as indicated on the button i.e. Round, can only be changed in the Drawing Properties.
The Reset button has no affect on toggles. For a full discussion on toggles see topic on Setup > Slots and Toggles.
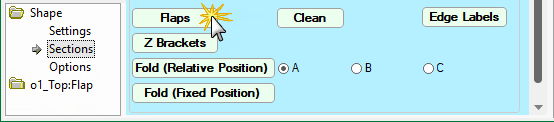
Flap options on the multi shapes are the same. The only difference is that they are accessed from the Shape > Sections page by clicking on the Flaps button.
The only consideration is how many sections are required for your shape and then you can customise individual sections.
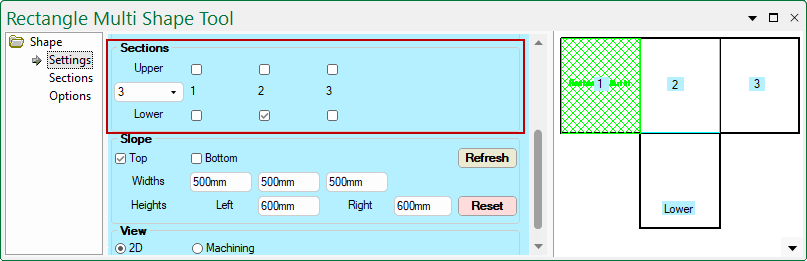
First, the number of sections needs to be designated on the Settings page.
- In this example, using the drop list, we have created 3 sections
- a Lower sub section has been added temporarily to the middle section to illustrate the use of these checkboxes.
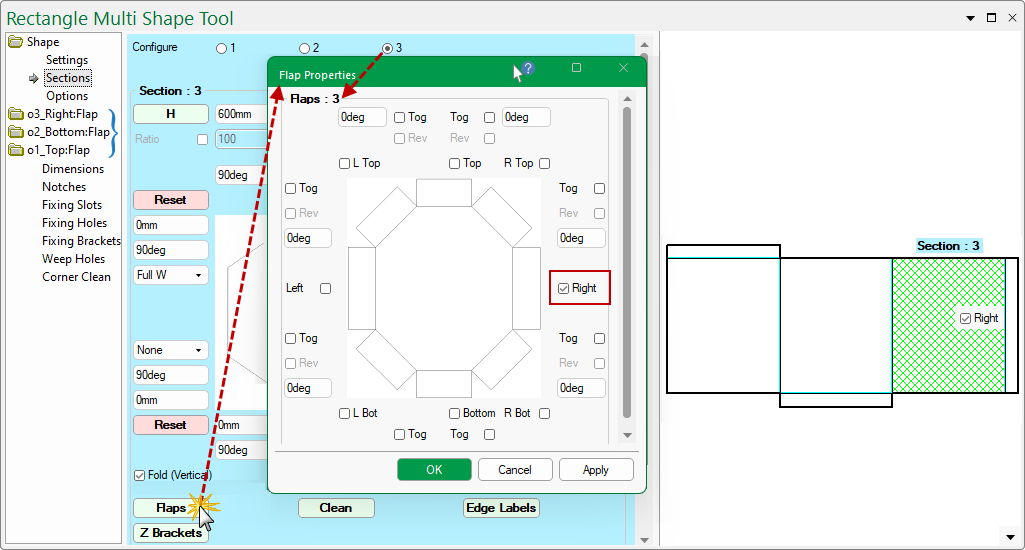
Then, go to the Sections page and click on the Flaps button and add required flaps.
- Use the Configure radio buttons to select each of the sections that require flaps.
- In this example, we have three flaps and one flap has been added to each section.
- Notice the Category Tree has added categories for each created flap, allowing individual customisation i.e. o1_Top:Flap and related pages.
- The Preview Pane will update as changes are made.
Secondary Flaps can be added to individual flaps and customised using the related Dimensions page e.g. o1_Top:Flap > Dimensions.
 and
and  buttons are also on the