ShapeMaster User Guide
Each Shape has Z Brackets Properties that are dependent on flaps being present and can be accessed either from the...
NB: The
and
buttons are also on the Settings page but simply change to the relevant pages.
or
 Watch the Video to learn how to set up angle brackets and save shapes to your library for later use.
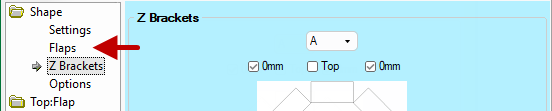
Brackets are only present when the flap is present. In the examples above, only the Top:Flap has been enabled.
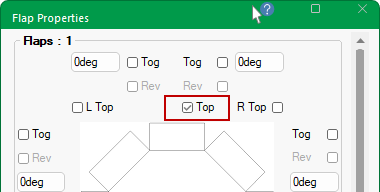
Flap Properties
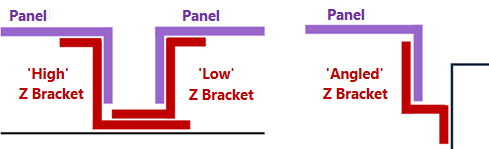
Z brackets are a popular method of securing panels to each other and the surface they cover. Several types of bracket can be used on any one job and are selected depending on the position of the panel and the bracket selected for an adjoining panel.
The brackets extend along the length of the panel and usually end shorter than its length. Their offsets from either end depend on shape and flap configuration.
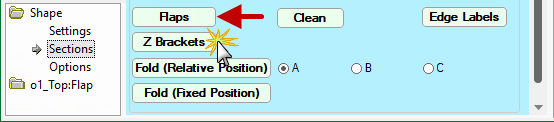
Accessing the Z Brackets properties are dependent on the whether the shape is Standard or Multi. However, the options are the same.
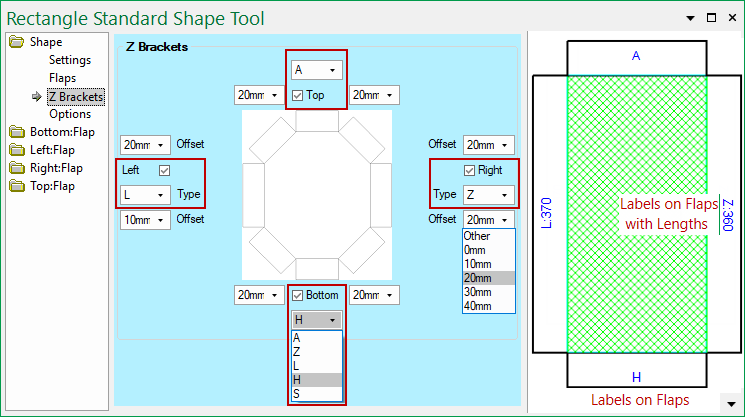
For a standard shape, options are available on the Shape > Z Brackets page.
Brackets are only present when the flap is present i.e. must be enabled on the Flaps page - Click to view Flaps page
If a shape can have multiple sections (e.g. Rectangle Multi), then options are located on the Shape > Sections page by clicking on the Z Brackets button.
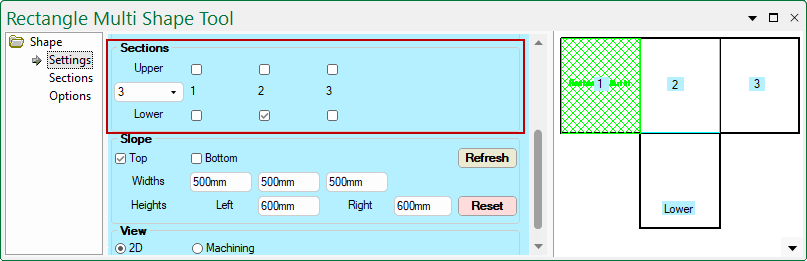
First, the number of sections needs to be designated on the Settings page.
- In this example, using the drop list, we have created 3 sections
- a Lower sub section has been added temporarily to the middle section.
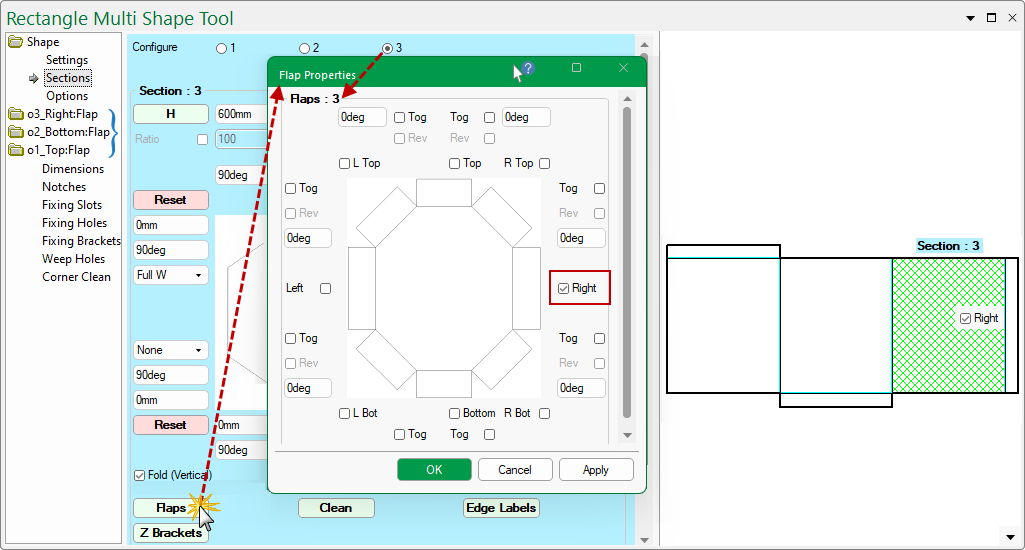
Then, go to the Sections page and click on the Flaps button and add required flaps for the Z Brackets.
- Use the Configure radio buttons to selected each of the sections that require flaps.
In this example, we have three sections and one flap has been added to each section.
Notice the Category Tree has added categories for each created flap, allowing individual customisation i.e. o1_Top:Flap and related pages.
The Preview Pane will update as changes are made.
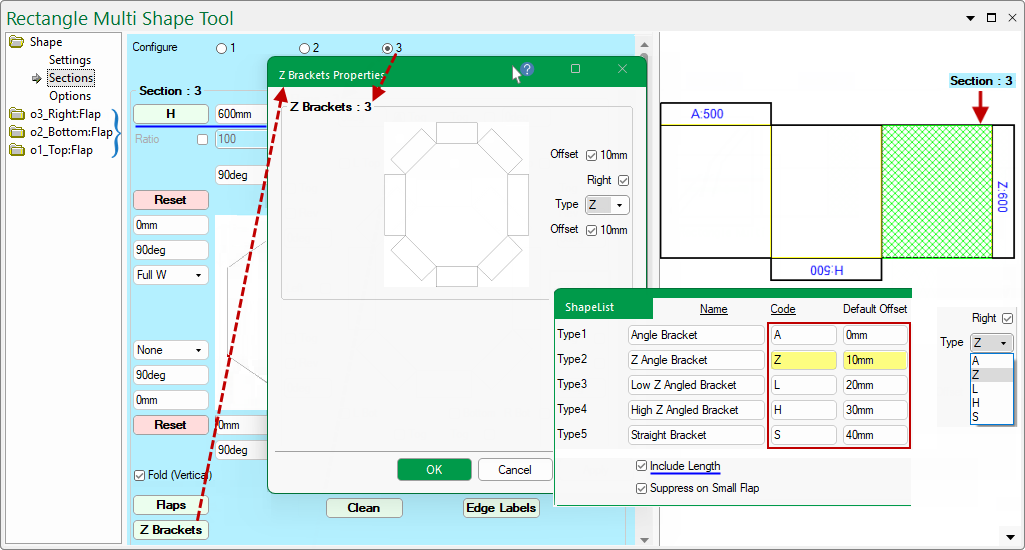
Finally, on the Sections page, click on the Z Brackets button to configure.
- Again the Configure radio buttons are used to select each of the sections that require Z Brackets.
- The Type Code and Offset measurements are determined by the defaults set in the Drawing Properties (shown).
- You can override the Type code by using the drop list selection
- The Preview Pane shows
- You can override the Offset by unticking the applicable checkbox. An edit box will be made available allowing you to manually type your desired offset.
- You can Show Label on the Preview Pane by ticking the applicable checkbox.
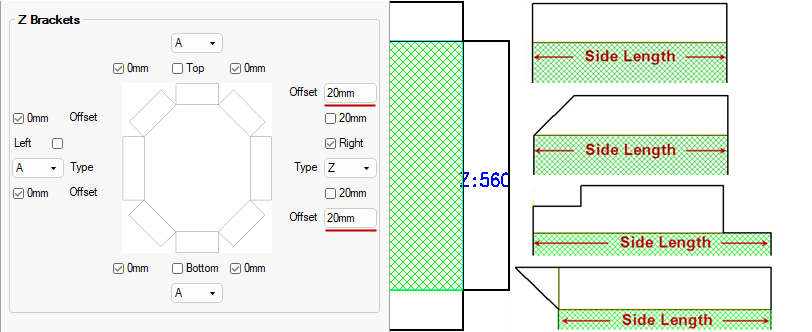
In this example the Right checkbox is ticked, so Z:600 is displayed.
Z is the Type Code and 600 is the Length (mm) which is displayed here because the Include Length checkbox in the Drawing Properties is ticked (shown).
The length of the Brackets is calculated as the length of the side minus the two offsets (regardless of any angle or cutout on the flap itself).
In this example the length is 600 (Height) minus (the Offsets) 20mm + 20mm = Z:560
Watch this video to learn how to set up angle brackets in ShapeMaster Software and save shapes to your library for later use. [4:11 mins]