ShapeMaster User Guide
Tools used for measuring different parts of your drawing are located on the Current Item Editor ribbon in the Annotations group of commands.
These tools offer powerful features which allow you to dimension drawings quickly and effectively.

Dimension tools allows you to manually measure individual items on your drawing page. There is a tool for measuring straight line items as well as angular items. You can customise font or change colour etc and save for future use.
 Watch the Video to learn how to add dimensions quickly and easily.
The dimension tool works in a 3 click process. Turn on Snap to Handle and select Dimension Tool  then... and drag dimension line
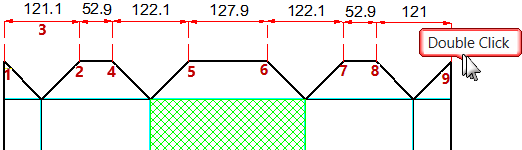
Start with the first 3 clicks, as per above, then continue clicking along the points of the shape. To start a new dimension run, double click.
You can move both individual dimensions and the dimension line to a new position, as shown. When the dimension is selected, it will change colour.
To delete a dimension line, simply select and hit the Delete key.
 Watch the Video for a demonstration of quick dimensioning.
If you double-click on the last point on a run of dimensions you are currently drawing, you can automatically start drawing a new dimension run.
To end, simply click the 'Dimension' command icon or another command.
For many tools, including the Dimension Tool, you can create customised tools and save for future use. Customised tools are saved in applicable subfolder of the ToolData folder.
You can personalise your dimension for just the current job or save it for future use. This includes colour, label size and options to either measure the width of each shape/item or display only the total length.
See discussions on Dimension Tool and Dimension Angular Tool and tutorial on how to format the dimension label.
File Locations for use with your ShapeMaster product can be viewed by accessing the File > Options [F10] dialog.
Quick Access to Saved ToolData
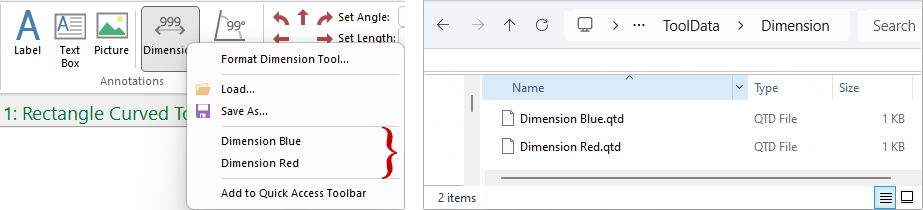
Customised tools saved in the ToolData folder are available from a quick access list as shown below left. However, note that only the first 10 are shown in the list (in alphabetical order). To use those not in the list, you will need to use the Load command.
Click to view example of over 25 files
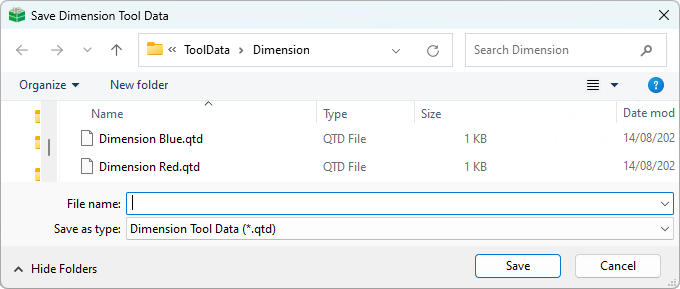
When you have completed customising a Tool, right click on the applicable Tool button in the ribbon and save as with a descriptive new name in the appropriate subfolder of ToolData folder. The file type will be QTD file.
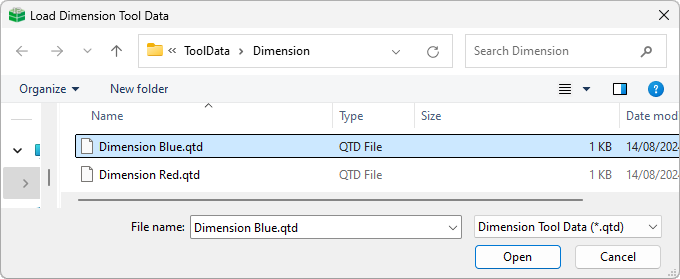
The Load command is really only required when the Quick Access list is greater than 10 saved qtd files.
When you select the 'Load' option the following dialog is presented, open at the applicable folder under ToolData. Simply select the required QTD file.
This video shows you how to add dimensions quickly and easily. (1:17 mins)