ShapeMaster User Guide
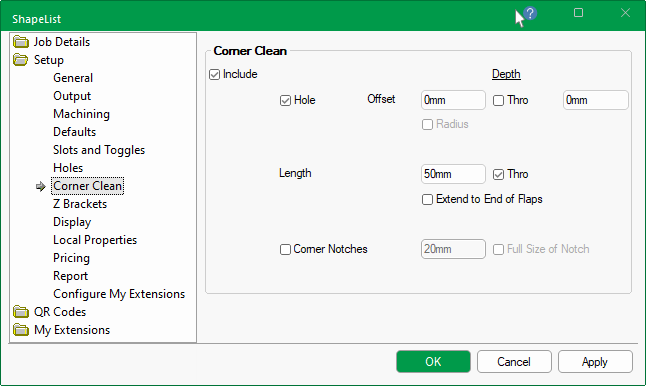
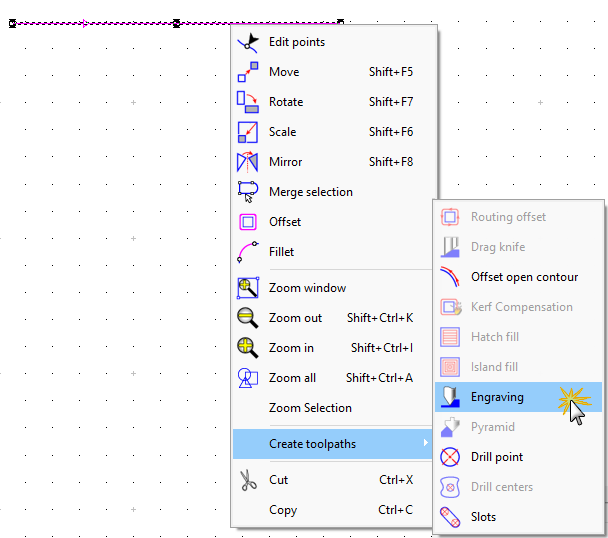
In ShapeMaster, the Corner Clean button allows you to add a continuous (triangular) toolpath into each corner to allow a small tool to get in and clean the corner out.
Click to Expand
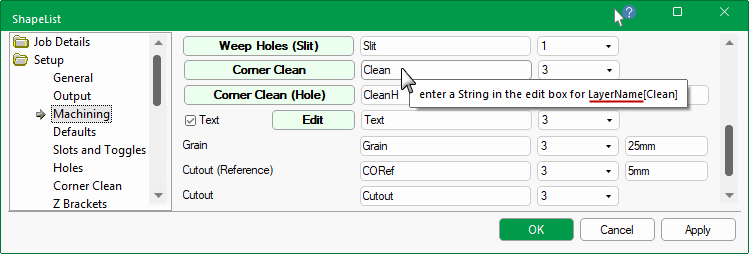
The Setup > Corner Clean page of the Catalog/Drawing Properties allows you to add a continuous (triangular) toolpath into each corner to allow a small tool to get in and clean the corner out or create a hole on each corner (which would required a separate tool).
A suitable tool can be created to the Tool Library in EzyNest.
 available when in Machining View.
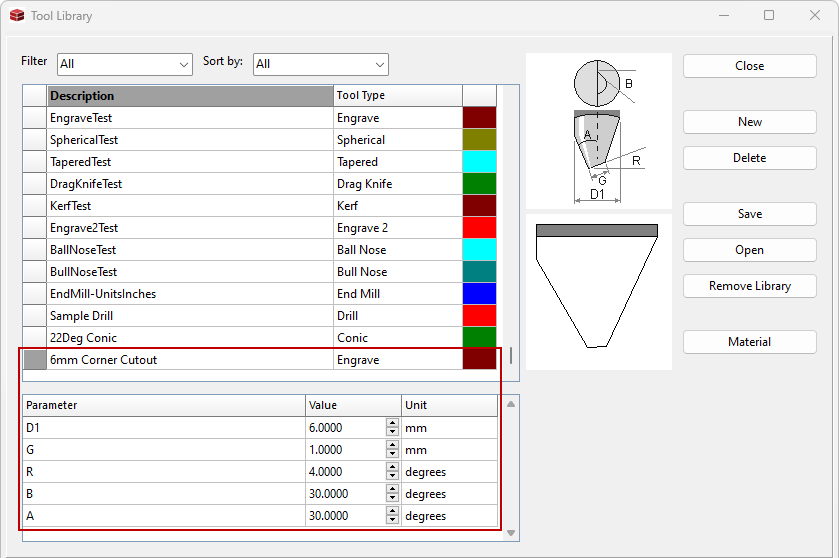
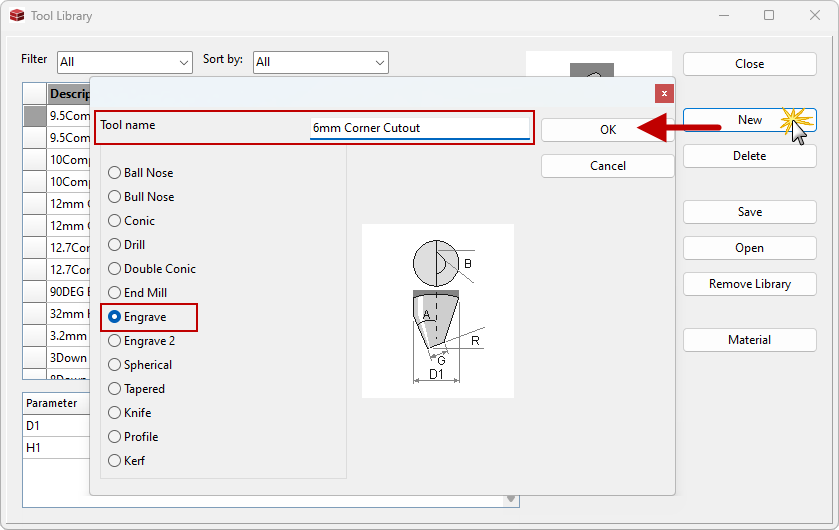
In this example we will create a new tool called '6mm Corner Cutout'.
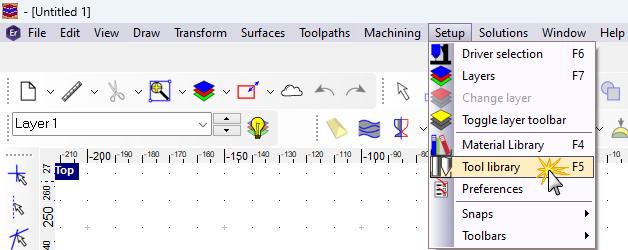
- Open EzyNest and create a new job i.e. File > New
- Then from the Setup menu select Tool Library [F5]
Setup > Tool Library
CNC Config can be used to add Tool - click here to see how!
- This will open the Tool Library properties. Click on New. (see example below)
- In the Tool name edit box type in 6mm Corner Cutout
- Use radio button to select Engrave
Create New Tool example
- This will add your new tool to the bottom of the tool list.
- Change the parameters to suit tool.
Tool Library List and Parameters
This an example of the 6mm Corner Cutout tool added to list.
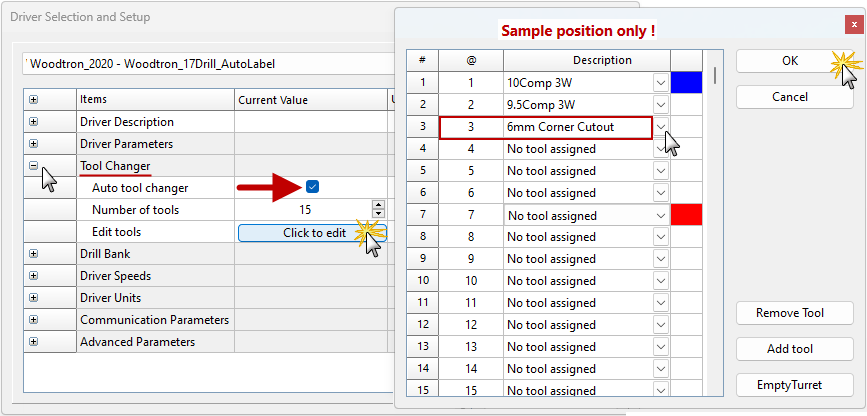
Now you can add the tool into the desired position of the router.
Driver Setup > Tool Changer Definitions example
Note that the position shown here for the Corner Cutout, which should be available for selection using the drop list, is an example only.
Click OK to close.
To create a strategy, for example an 'Engrave', you just draw a line and select it as shown.
Draw Line and create Engrave strategy
- This will open an Engrave dialog...
- From the Sort by drop list, select Engrave (click on image for example)
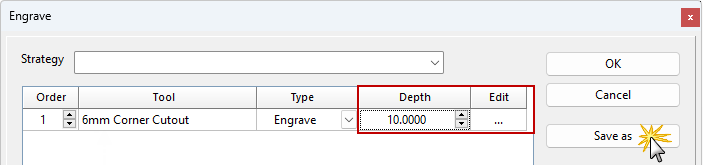
- You should be able to see the 6mm Corner Cutout tool previously created;
- Double click on this and it will be added to the Order list as shown below.
Click to view Sort and
- Enter Depth and click on Edit '....' to adjust feeds, speeds, etc.
- Save as and give it the desired Strategy name.
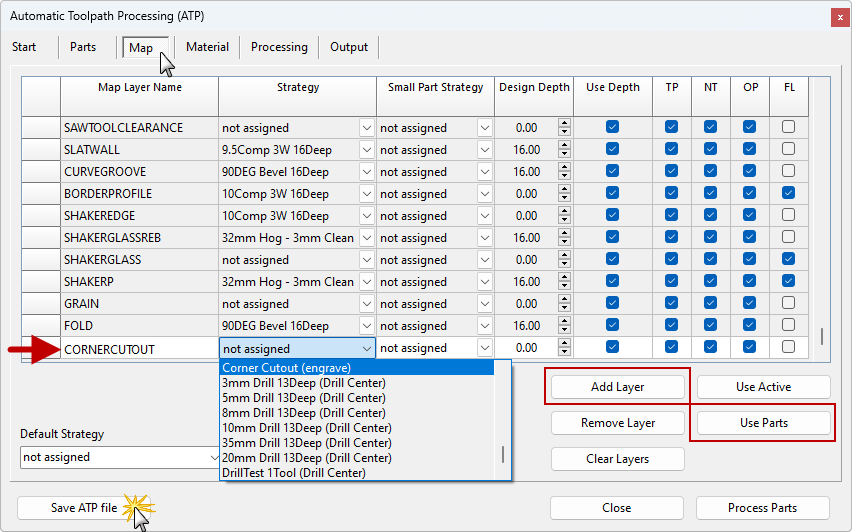
Open the ATP
and select the desired Strategy for the Layer name coming from ShapeMaster and Save so that these settings will be remembered for future jobs.
ATP Example
This is done on the Map tab (or, if prior to EzyNest23, the Define Layers tab).
Note: If the new layer name is not in the Layer Name list, then use either the Add Layer or the Use Parts buttons.